A flat tyre or puncture can really put a dampener on your day. Getting a flat tyre on the go can delay your journey by quite a while, especially if you decide to wait around for a breakdown service. Thankfully, although it can be a dirty job and it’s nobody’s idea of an enjoyable time, a wheel change can be a fairly quick procedure and one that, if you follow our steps, should only take minutes instead of hours.
What you need
- Hi-vis vest (recommended)
- Lock nut key (where required)
- Wheel brace
- Jack
- Spare wheel
- Wet wipes (recommended)
What to do if you’ve got a flat tyre
1. Stop right away
A flat tyre on the move is usually indicated by a characteristic slapping noise and the car’s handling is often negatively affected with heavier steering and even the car pulling to once side. Lots of newer cars feature electronic tyre pressure monitoring to let you know if there’s a problem.
Should you detect any of these signs, stop in a safe place as soon as possible as driving for more than a few hundred metres on a totally flat tyre can cause irreparable damage meaning you’re in line for the full cost of a replacement tyre – and maybe even the wheel. Try to find solid, level ground on which to park the car as this will make changing the wheel safer and easier.
2. Take safety precautions
Stopping at the side of the road can be potentially dangerous, so it’s advisable to take a few basic safety precautions. Switch on your car’s hazard warning lights for a start and bear in mind that donning a hi-vis vest can make you extra visible to other traffic. If your car has a breakdown warning triangle, it may be a good idea to position it 50-100 metres behind your car as well.
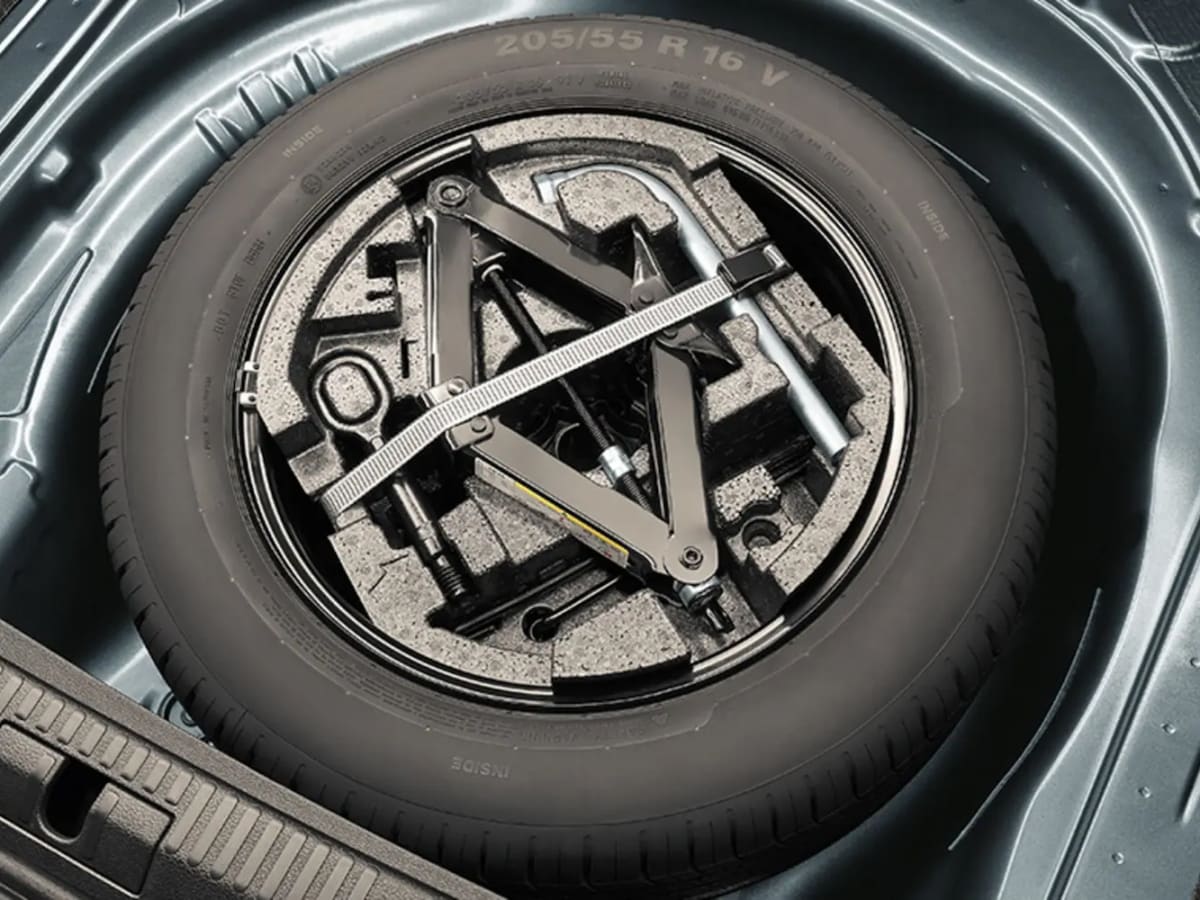
3. Locate your tools
The basic tools required for changing a wheel are a jack and a wheel brace, and these are usually located under the floor of the boot in your car. Many cars’ wheels are fitted with a locking wheel nut to prevent theft, and the key for this should also be located somewhere in your car. Retrieve the spare wheel from where it’s located, often, like the jack and wheel brace, under the floor of the boot.
4. Chock the wheels (recommended)
This won’t be possible in every case, but in addition to leaving the handbrake on and car in gear, it’s a good idea to put some kind of wedge like a piece of wood or a rock under one or more of the car’s wheels to provide some extra protection against the car rolling back or forward. Chock the rear wheels if jacking up the front, and the front wheels if jacking the rear.
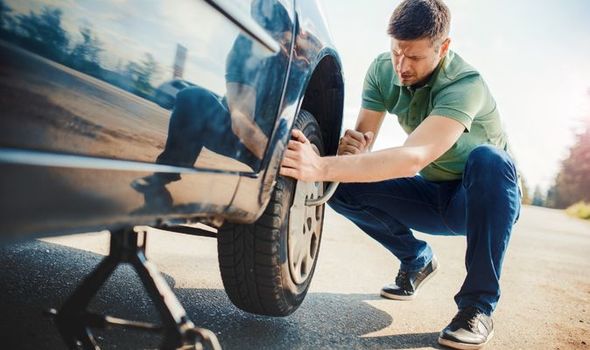
5. Loosen the wheel nuts
If you don’t have alloy wheels, you may first need to remove a hubcap or plastic wheel cover. This can often be removed with a good tug, though some wheel braces will be fitted with a flat end to help you prise it off. Once you have access to the wheel nuts, apply the wheel brace to the head of the nuts and rotate in an anti-clockwise direction to loosen. Do not remove the nuts at this point, just loosen them and try to do so by loosening the nut opposite the one you’ve just done in a kind of cross-shaped sequence. If you have a locking wheel nut, fit the key into the wheel brace and apply it to the locking nut to loosen.
Because garages often tighten wheel nuts using an air-driven ratchet ‘gun’, they may be incredibly hard to loosen with just a wheel brace and if you don’t have the strength, it’s worth calling or asking for assistance rather than doing yourself an injury or damaging the wheel nut.
6. Jack up the car
Your car’s jacking points will usually be indicated in the vehicle’s user manual and it’s important to use the jacking points as they’re specially strengthened to support the weight of the car. Once you have the jacking point located, you should see a ridge that is designed to fit into a corresponding depression at the top of your jack. Making sure that the jack is on solid, level ground, rotate the jack handle clockwise until the affected wheel rises well clear of the ground.
7. Remove wheel nuts
Only when the wheel is off the ground should you actually remove the wheel nuts using either your hand or the wheel brace.
8. Remove the wheel and replace with the spare
Once the wheel nuts are off, the wheel itself should come away. Sometimes this takes some extra levering as the wheel is stuck to the hub, but make sure you don’t put any part of your body under the car when doing this. When the affected wheel is off, replace it with the spare, making sure the holes for the wheel nuts are lined up.
*Tip: After the old tyre is removed, place it under the side of the car adjacent to jack. This is a precaution incase the jack slips, the car will sit on the wheel and not damage the exposed wheel and brakes.
9. Reverse the process
To get back on the road, repeat the removal process in reverse. Although you should make sure the wheel nuts are securely tight before you lower the jack, be sure to give them an extra tighten once the car is back on the ground. Don’t forget to gather up all your tools and your warning triangle (if you’ve used one) and to remove any wheel chocks. If you keep wet wipes in the car, clean your hands as changing a wheel can be a dirty job and you don’t want to transfer that dirt to the inside of your car.
10. Continue your journey
If your spare wheel is a skinny space-saver, don’t exceed the recommended maximum speed displayed on the wheel. This is only to get you out of a tricky situation, and you should take your car to a garage or a tyre fitter as soon as possible to get your flat tyre repaired.
Tips to make life easier
There are a few precautions drivers can take to avoid being caught out by a flat tyre and which may make changing a wheel a lot easier or avoid it altogether.
Carry emergency puncture repair kit
Carrying a can of emergency puncture foam (such as Holt’s Tyreweld) can be a good idea as it may avoid having to jack up the car at all if you have a puncture. The can features a nozzle that attaches to the valve of the tyre, pumping it with air and expanding foam that seals the puncture and reinflates the tyre. This is still just a temporary solution though, so drivers will have to get the tyre properly repaired as soon as possible, and it may not work on badly-damaged tyres.
Grease the wheel nuts
Rusted or over-tight wheel nuts may mean that a wheel cannot be easily removed at the side of the road. Periodically removing your wheel nuts at home, applying grease and manually re-tightening them could save you struggling on the hard shoulder.
Carry an extension bar
A simple wheel brace may not give you enough leverage to loosen an over-tight wheel nut. A longer ‘breaker’ or extension bar with an appropriately-sized socket at the end may be a particularly useful tool for undoing tenacious wheel nuts as they give the user a lot more leverage making it much easier to undo a nut.
Get priceless peace of mind with a free tyre safety check from BestDrive by Continental. Register for your free tyre safety check now to ensure you and your passengers are safe on the road.